Expenses & approvals
How to submit an expense claim
Updated September 17, 2026
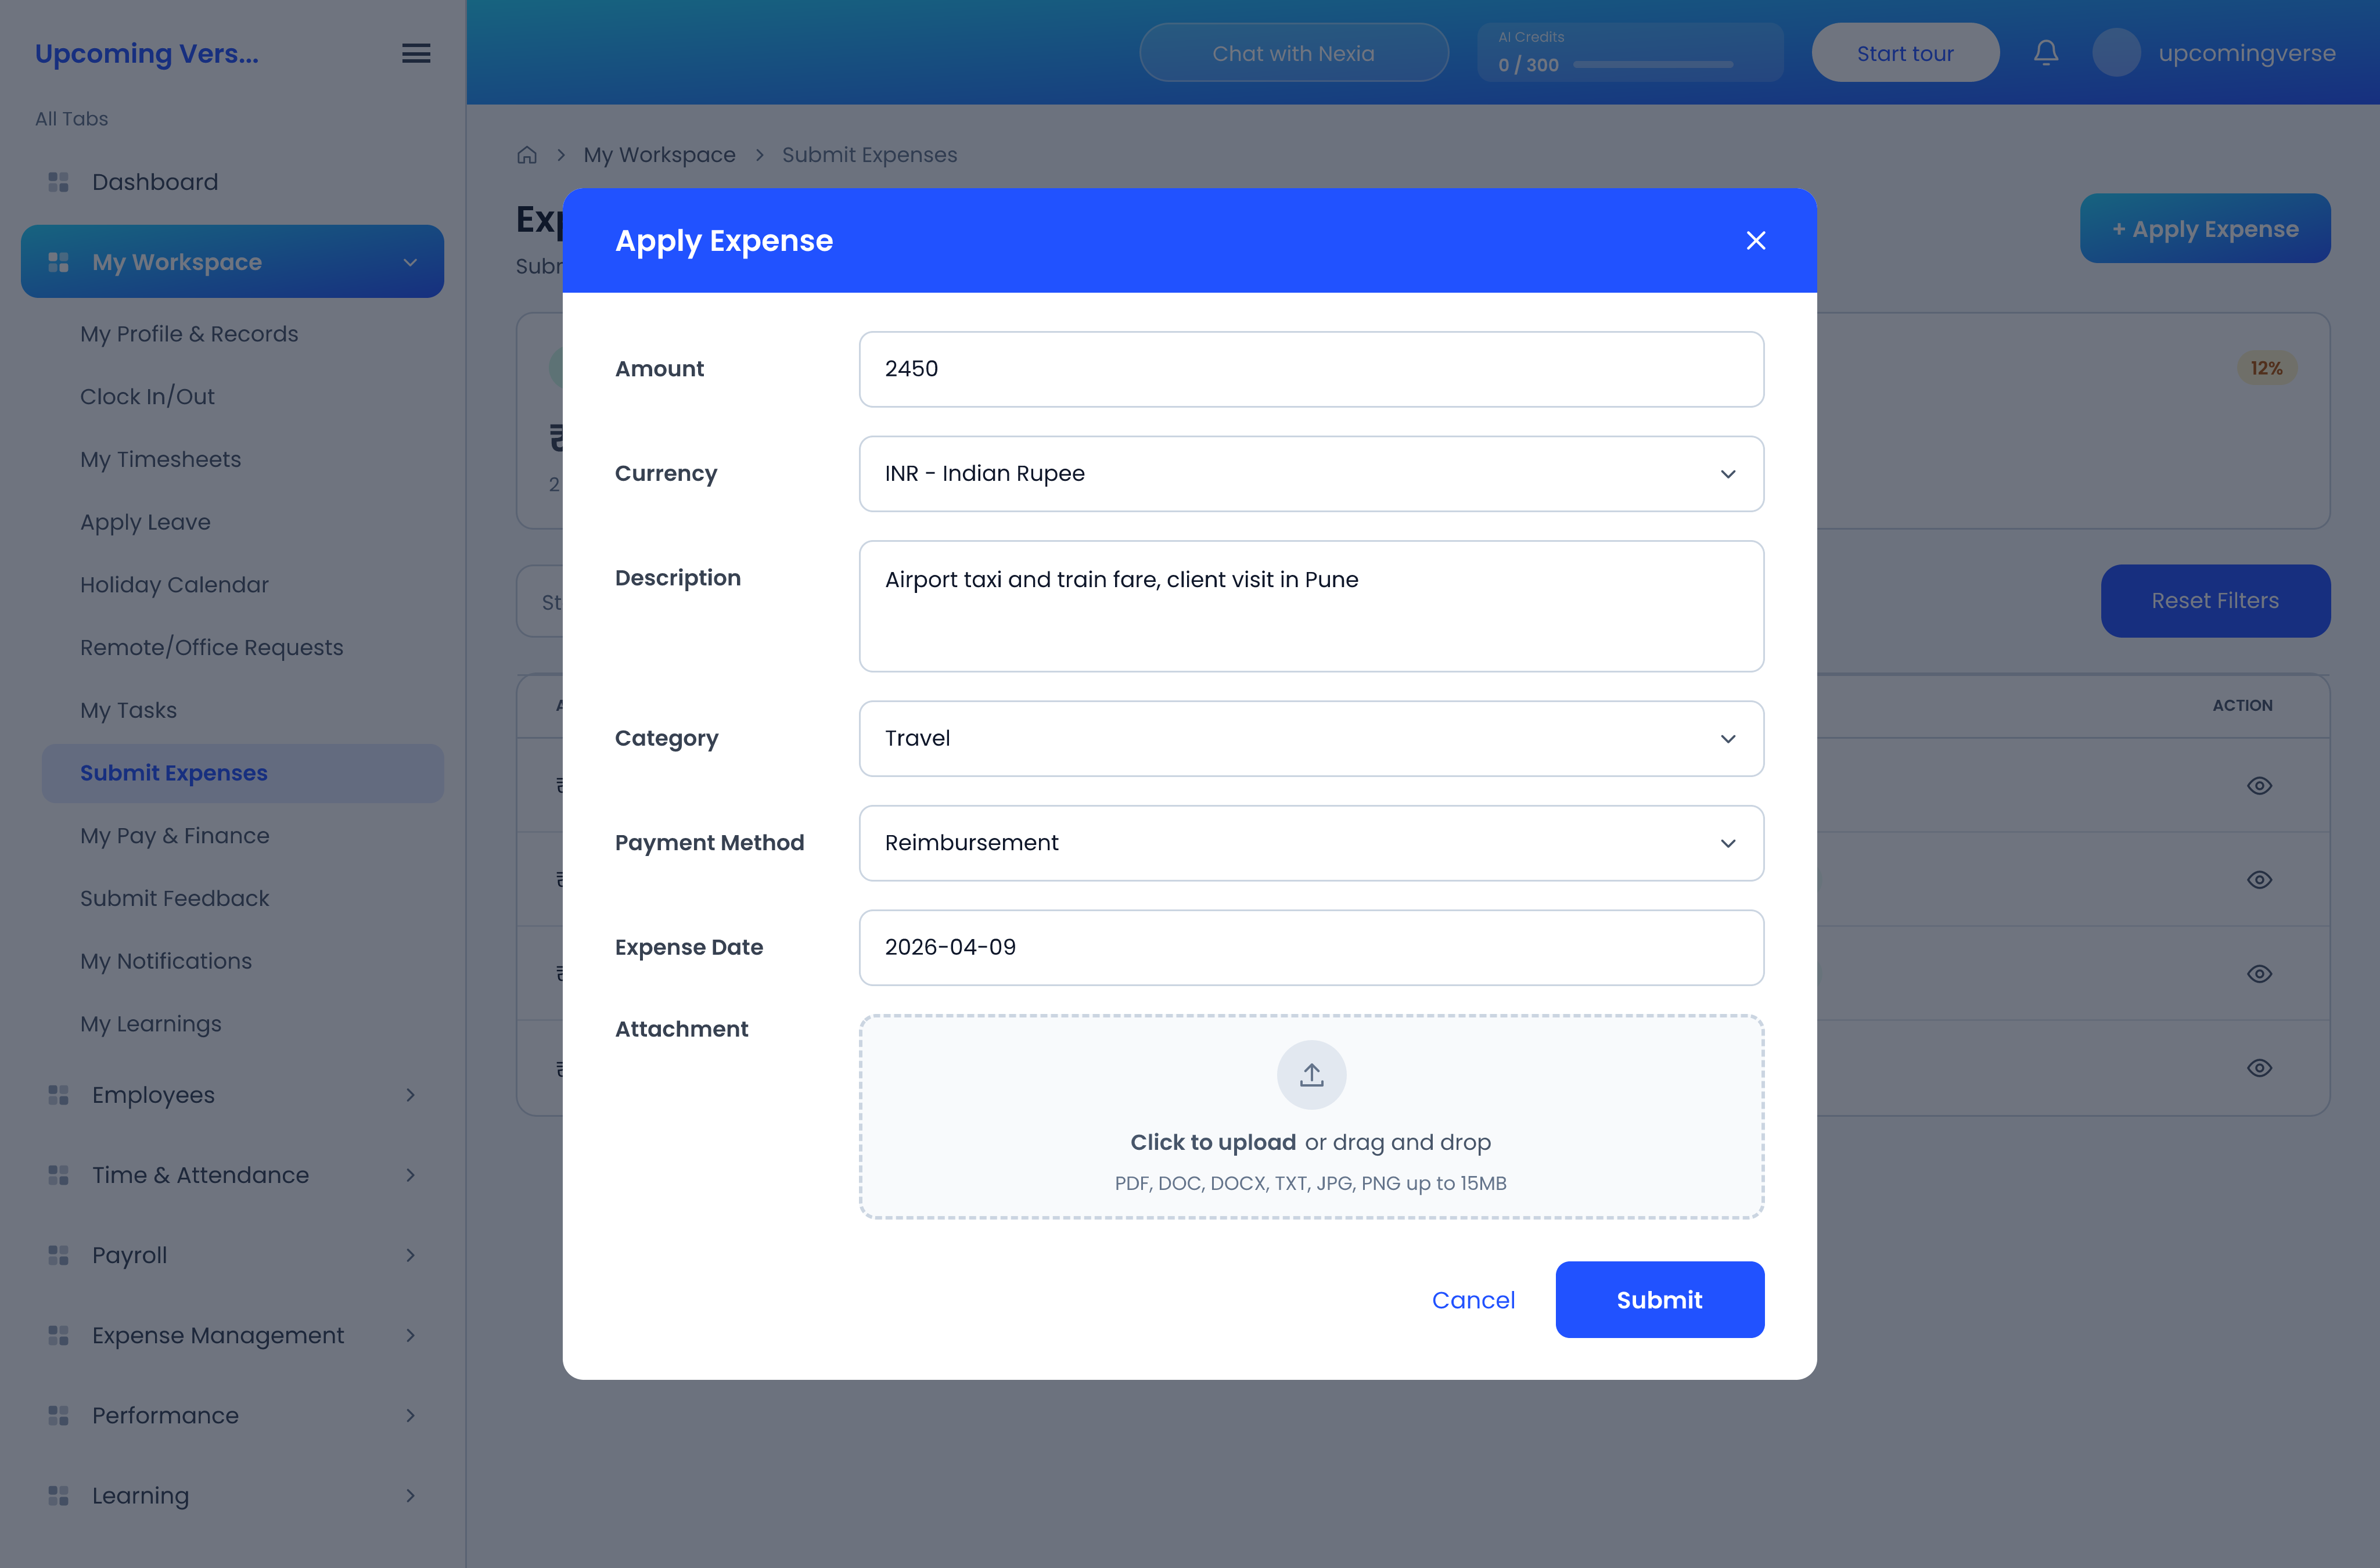
- Open My Workspace → Submit Expenses.
- Create the claim and fill in the amount and category.
- Attach the receipt.
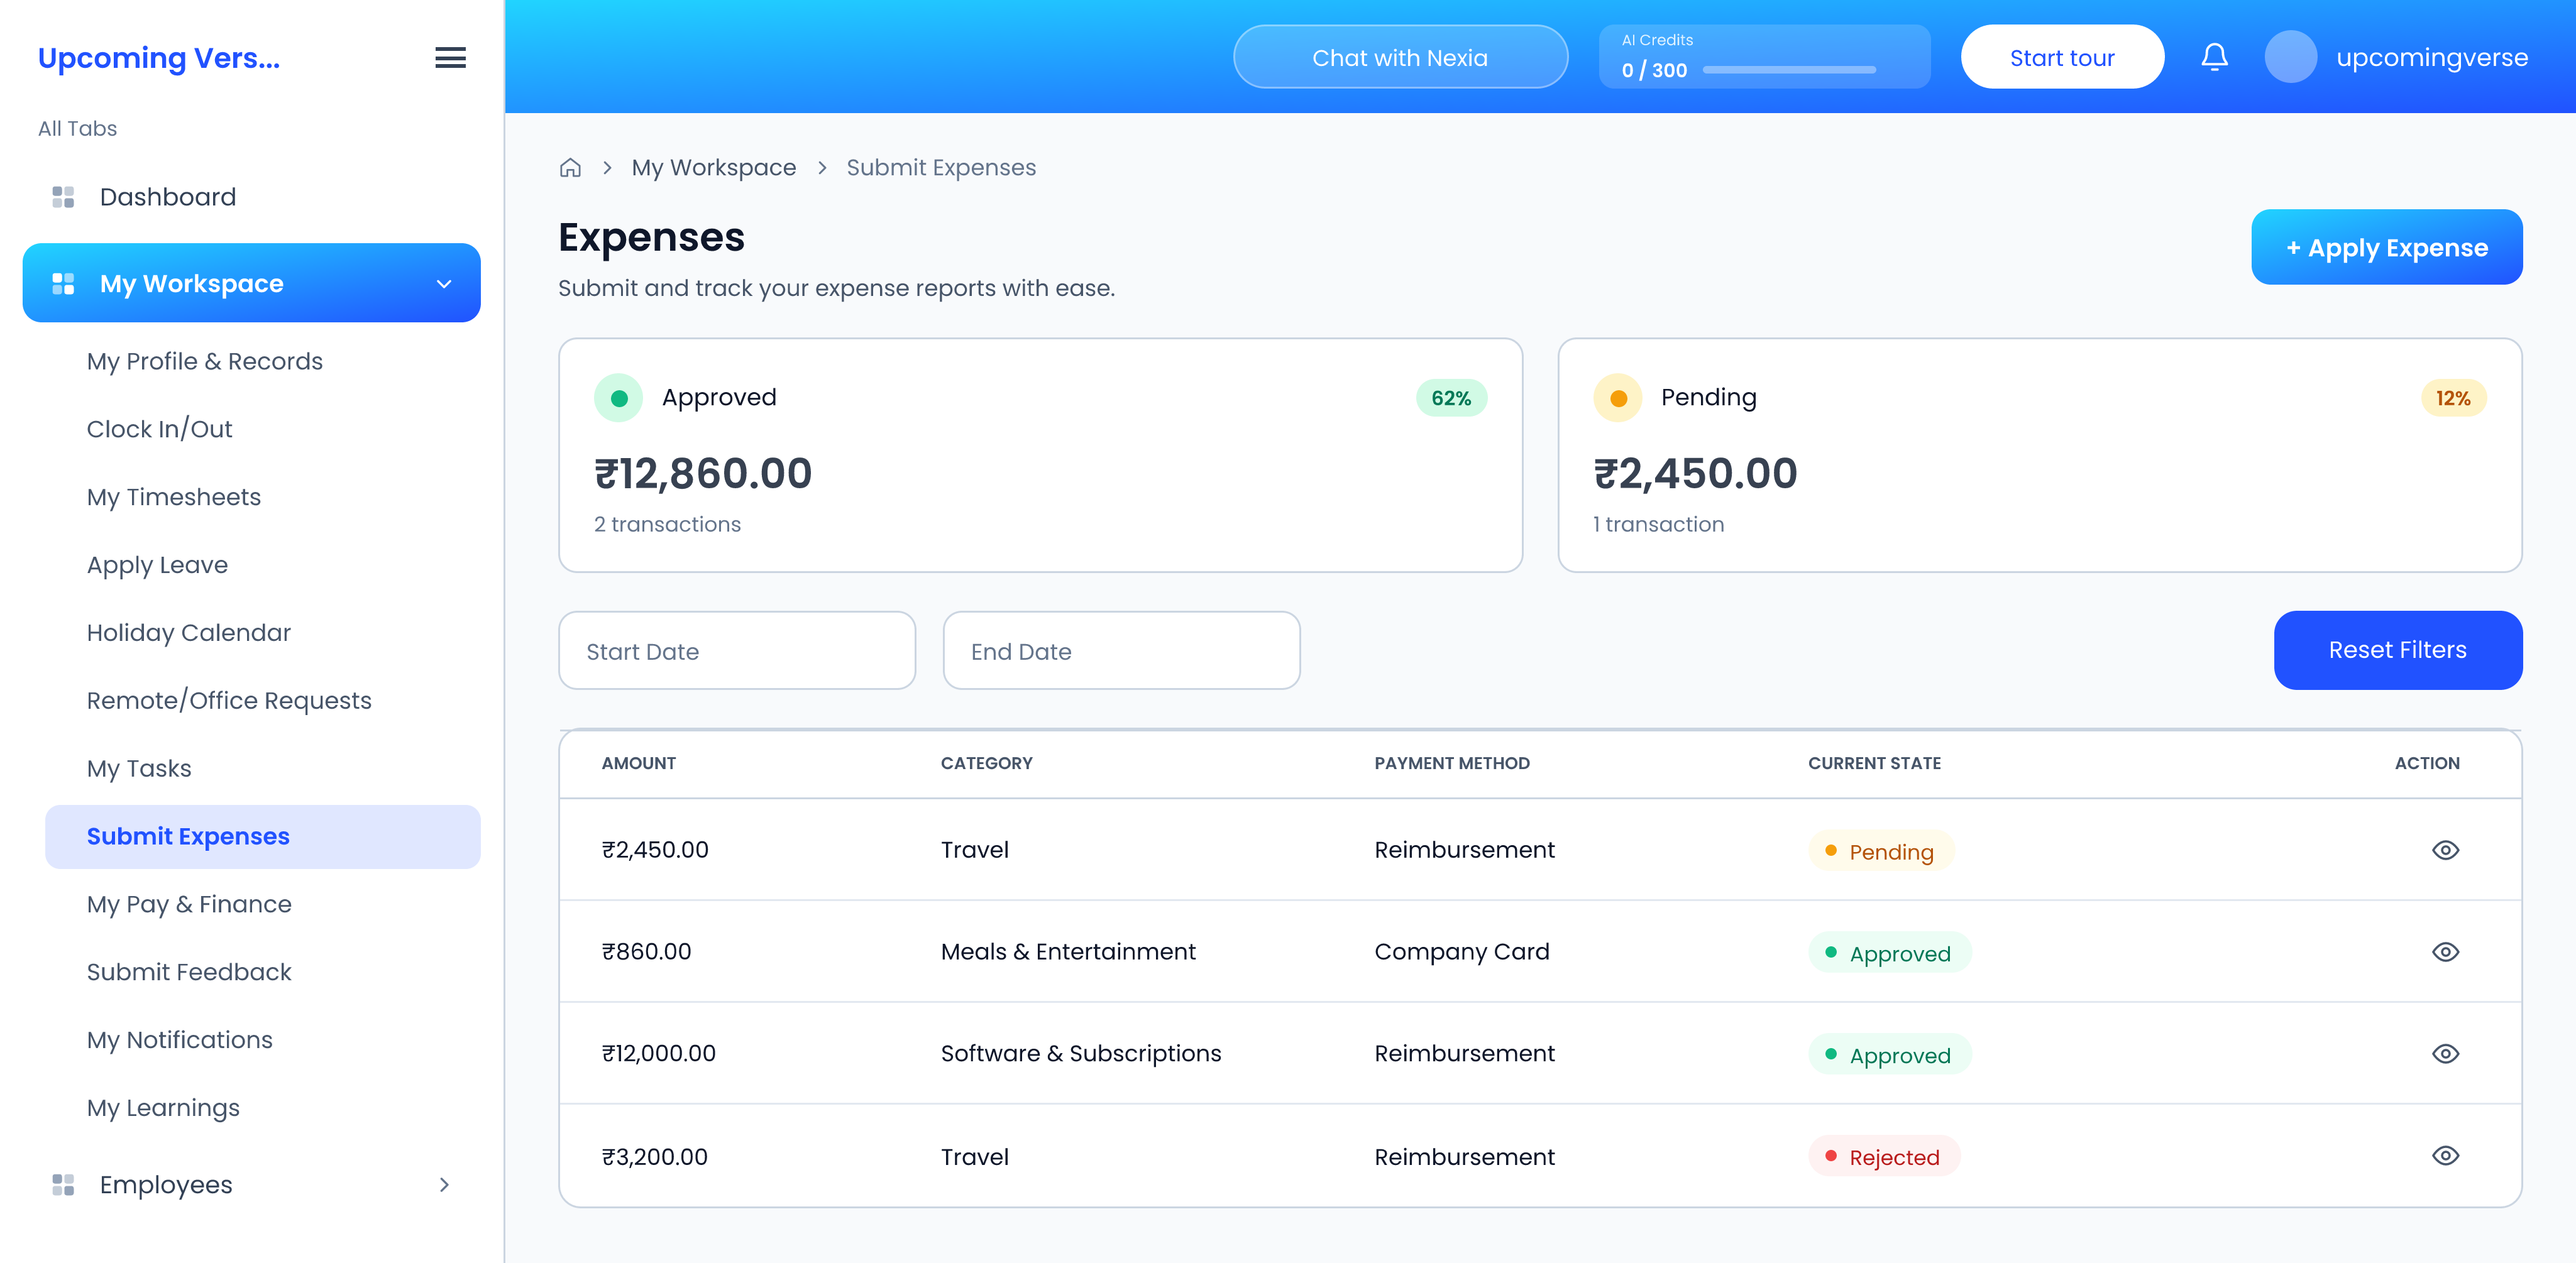
- Submit, then follow the status from the same screen.
The rules come from your organization
Which categories exist, what the spending limit is, and whether a receipt is mandatory are all set in your organization's expense policy. A claim can be refused for a rule that is specific to your organization, so if one comes back rejected, the policy is the place to look rather than the claim itself.
Attach the receipt even when it is not mandatory
Where receipts are optional, a claim without one takes longer to approve because the approver has to ask. It costs nothing to attach it.
Taggedexpensesclaimreimbursementreceipt