How to set up approval workflows
Updated September 17, 2026
A workflow decides who a request goes to, and in what order. Instead of one approver, a request can pass from a manager to a department head to HR, each stage waiting for the one before it.
What can have a workflow
- Leave
- Expense
- Work Type
- Timesheet
- Requisition
Build one
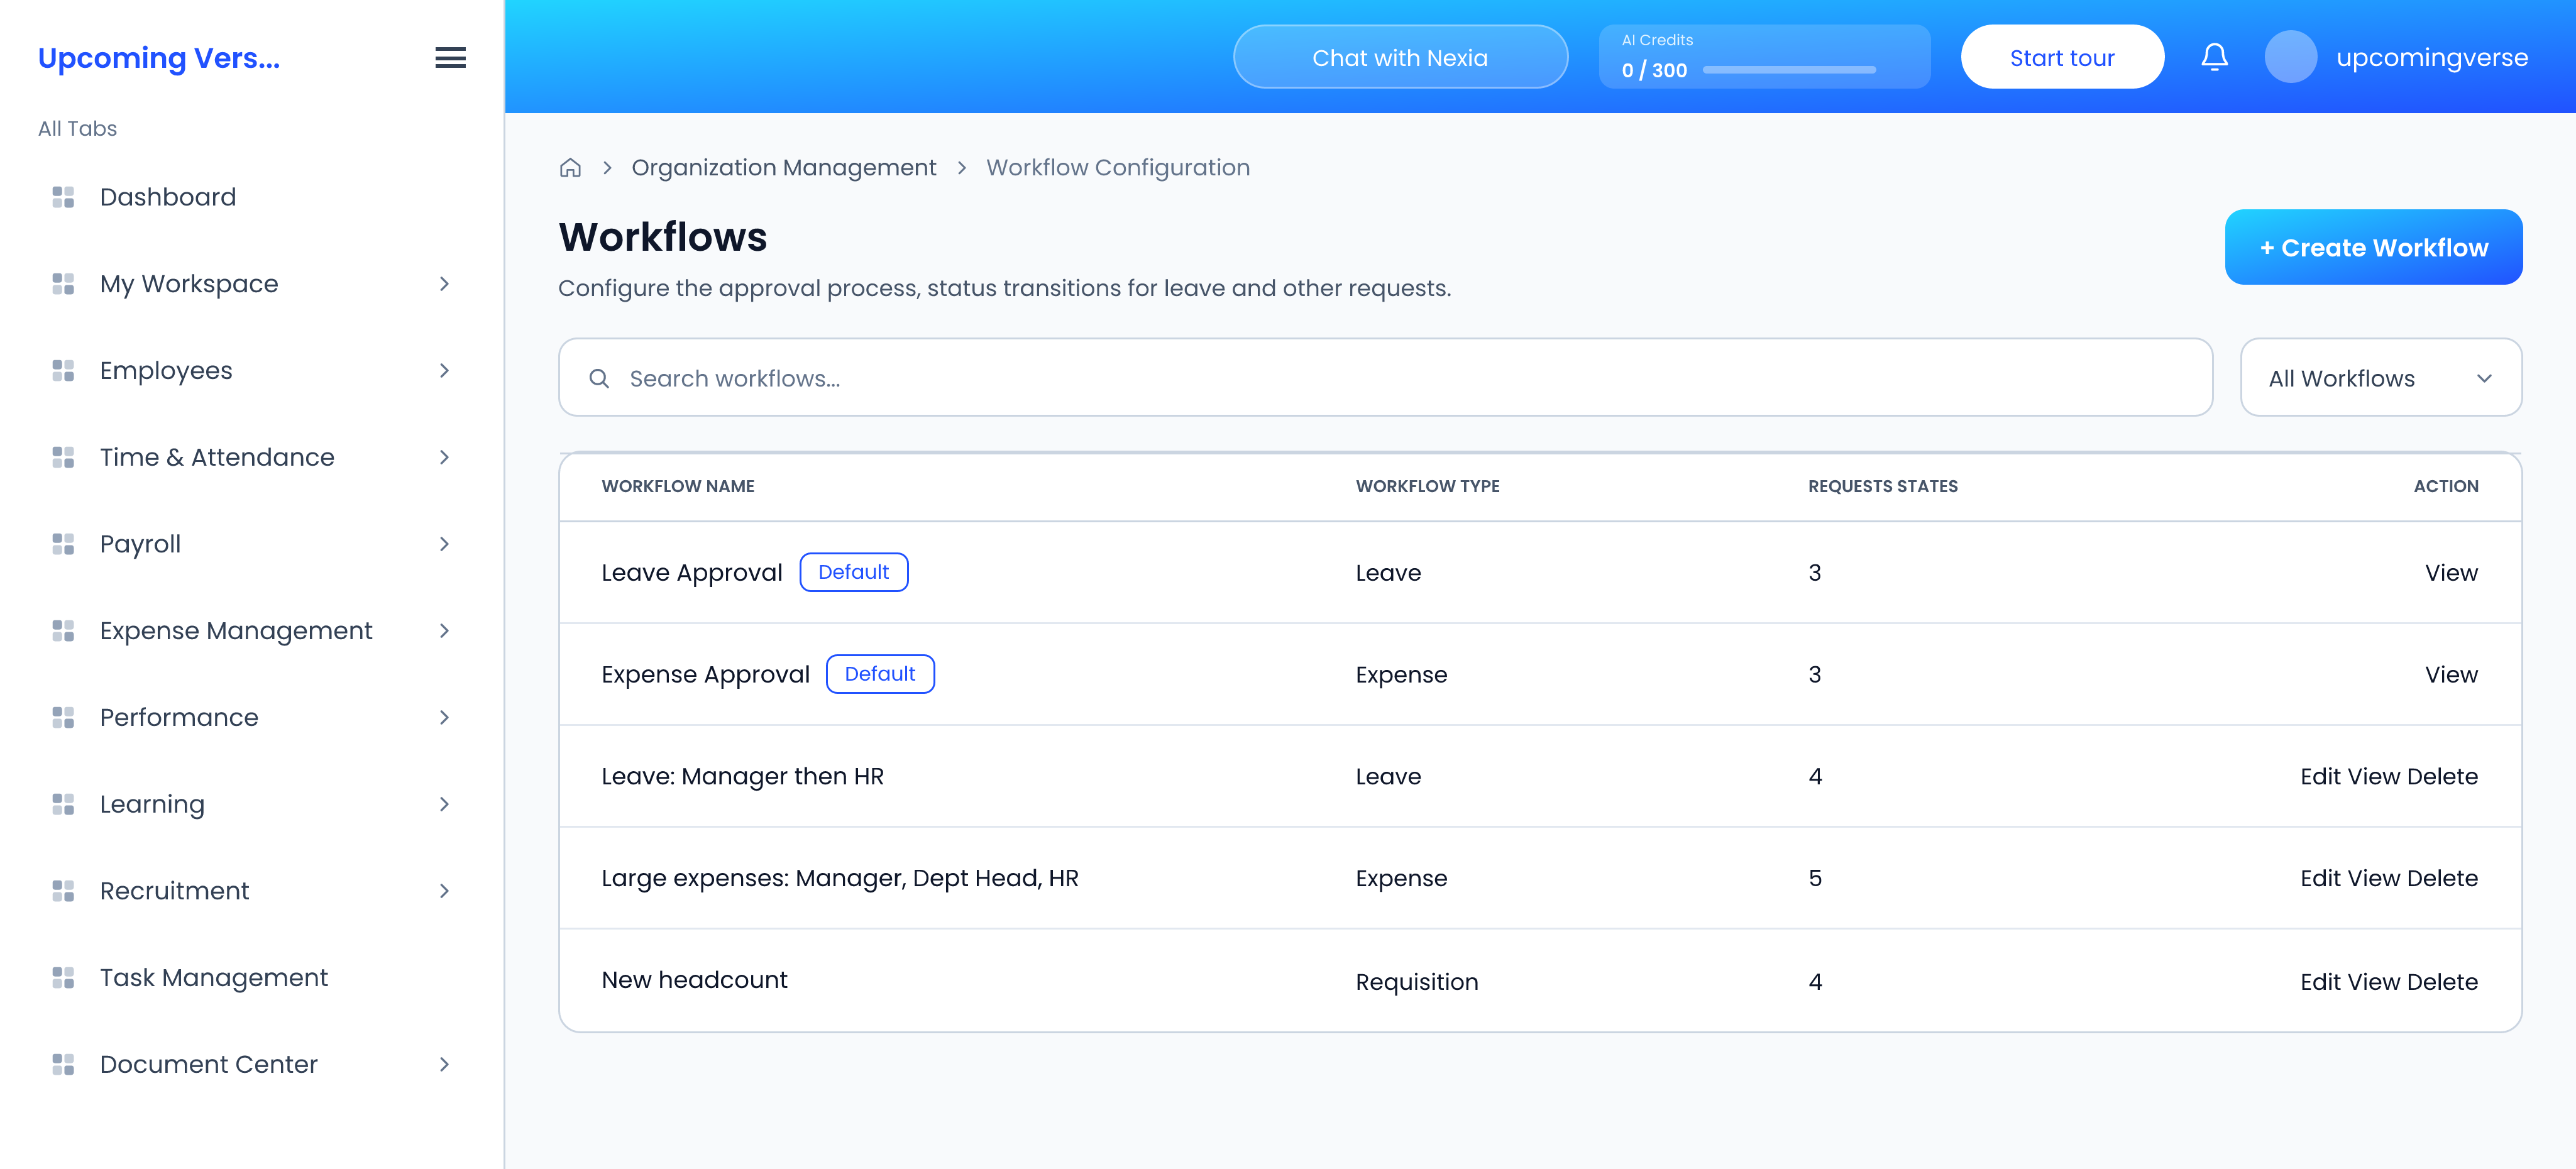
- Open Organization Settings → Workflow Configuration.
- Click Create Workflow, name it and choose its Workflow Type.
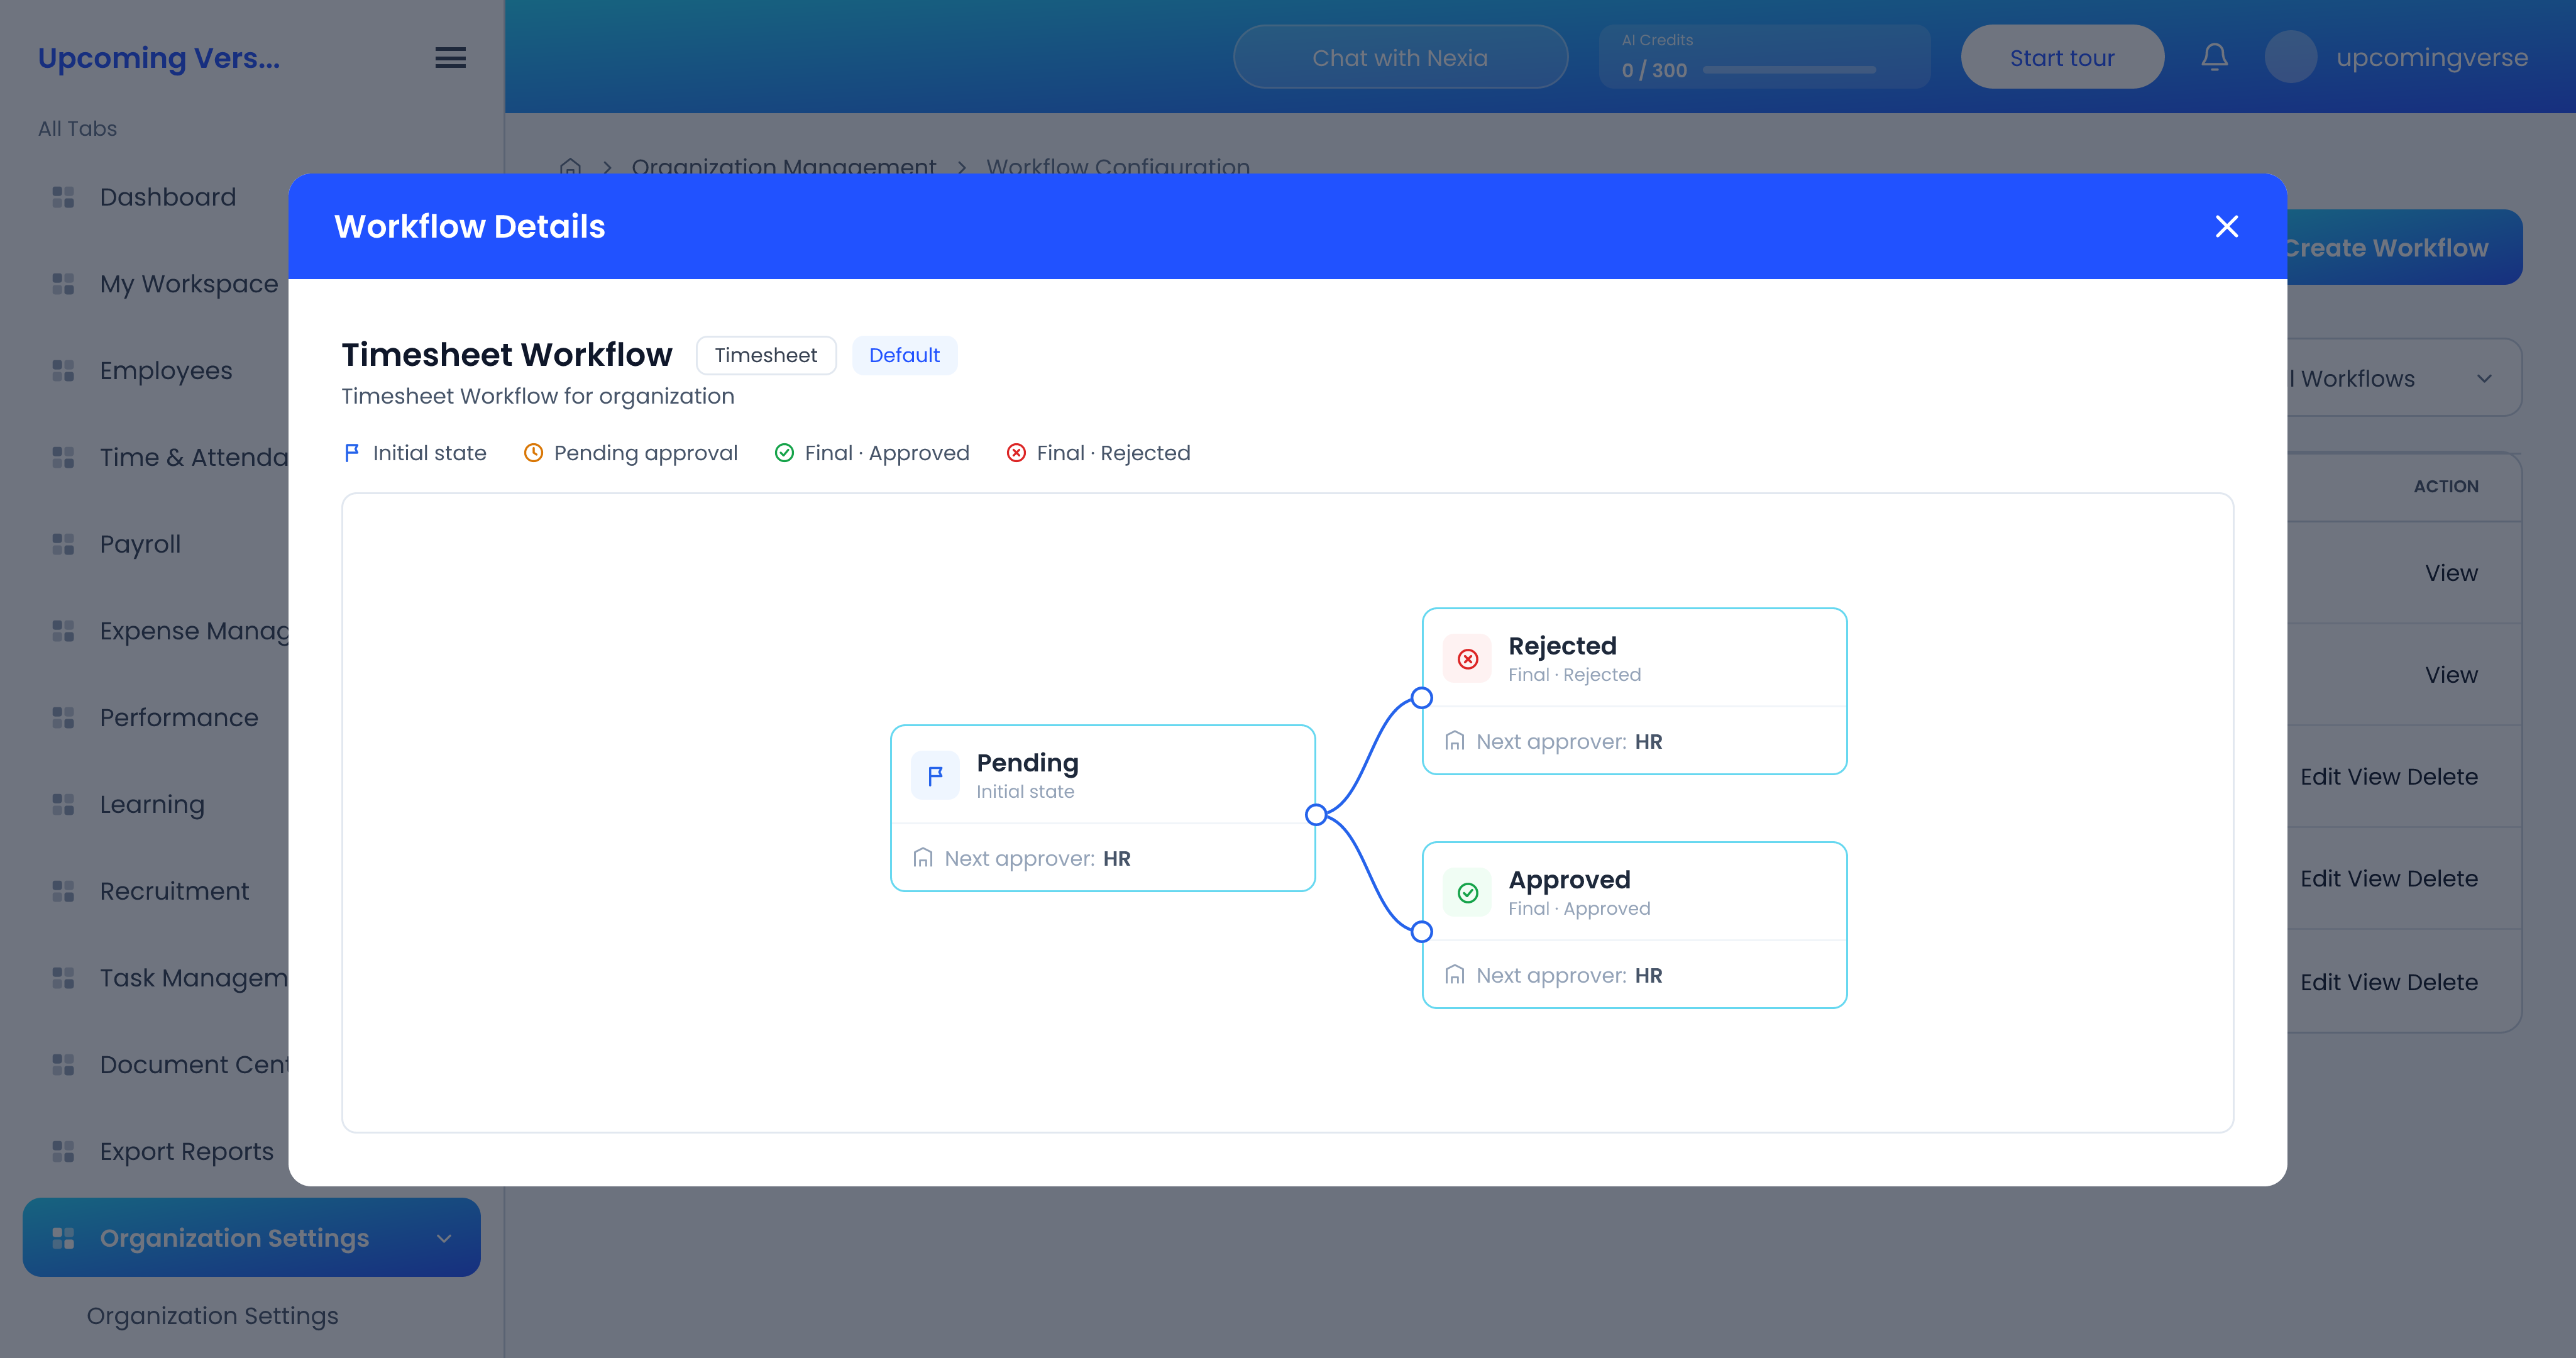
- Add the states a request moves through. Each pending state names its next approver: the requester's Manager, their Team Lead, their Department Head, HR, or a specific person.
- End the chain with a final approved state and a final rejected state, and save.
The Workflows list shows each workflow's name, type and how many request states it has. Use the view action to see the chain drawn out.
Put the workflow to use
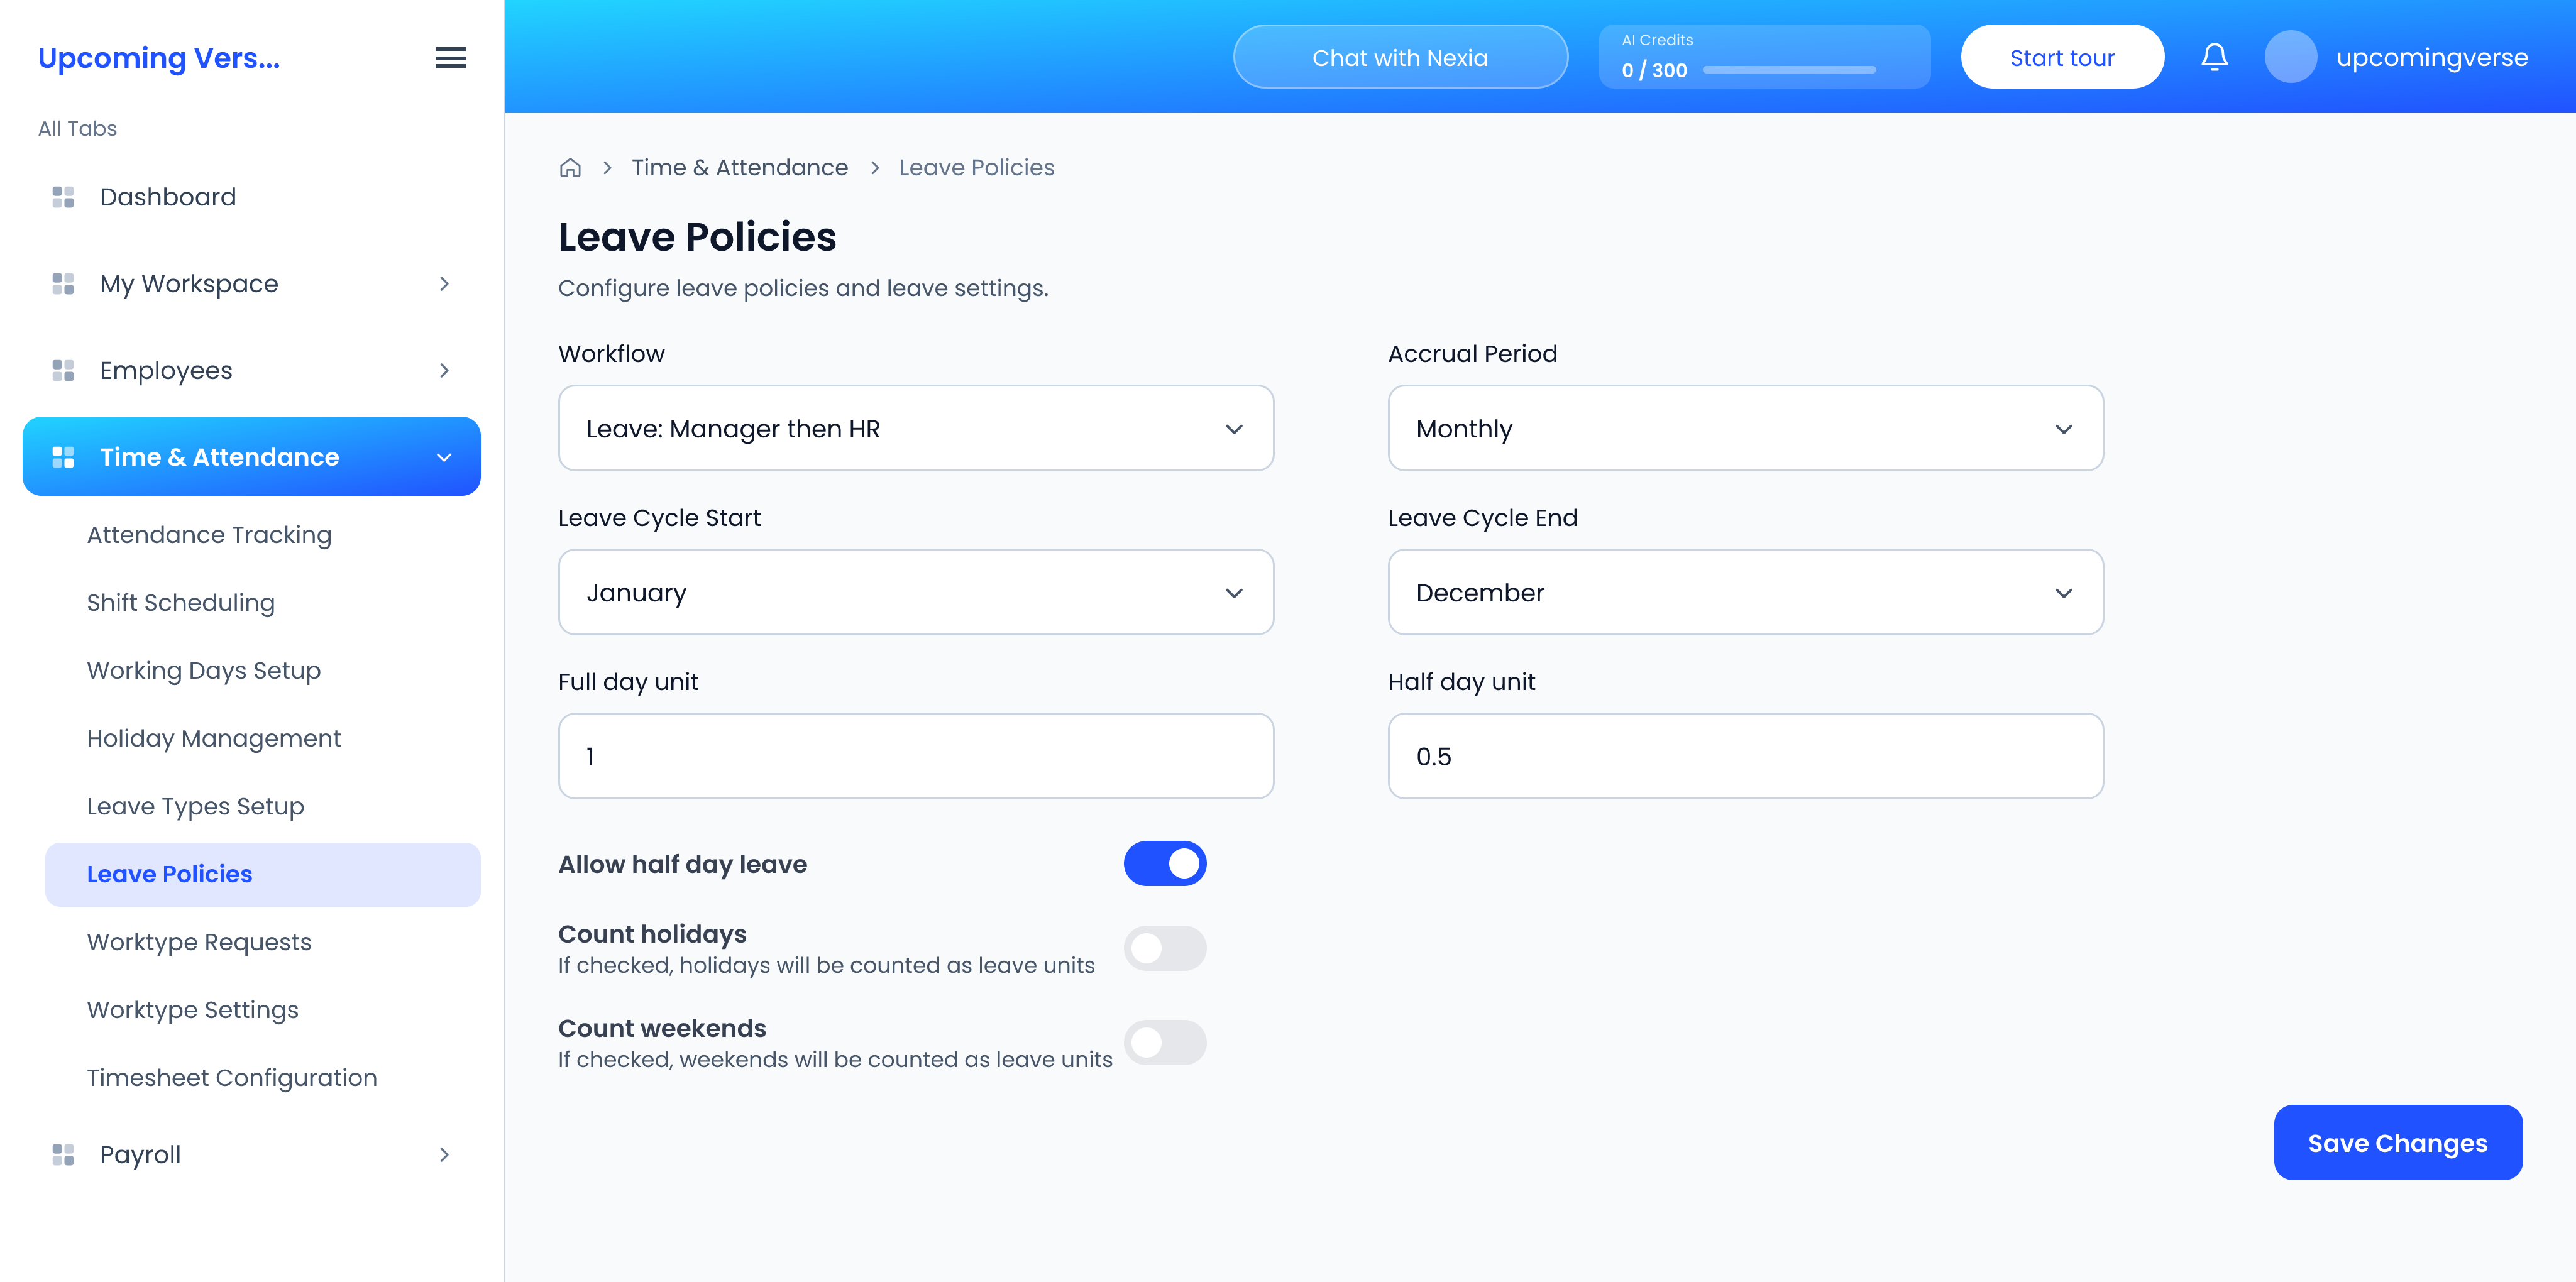
Creating a workflow does not switch it on by itself. Choose it where that kind of request is configured:
- Leave — Workflow in Time & Attendance → Leave Policies.
- Expenses — Approval Workflow in Expense Management → Expense Policies.
- Requisitions — Requisition Workflow in Recruitment → Recruitment Settings.
The default workflows
Workflows marked Default come with the product and cannot be edited or deleted. To change how requests are routed, create your own and select it instead.
"Why did my request go to that person?"
The workflow decides the route, not the person who submitted the request. A request that lands somewhere unexpected usually means the next approver is a role — such as Team Lead — that resolves to someone other than you expected.
An approver cannot find a request
Approvers act from Employees → Approval Center, where each tab is a separate permission. An approver in an expense chain needs the expense approval permission on their role, or they will not see the claim at all.